As an Amazon Associate, we earn from qualifying purchases. Some links on this site are affiliate links at no extra cost to you. Our recommendations are based on thorough research and editorial judgment.

Setting Up Your First Drum Kit: A Complete Guide
Setting up your first drum kit can be exciting! Start by understanding the parts like the bass drum and snare. Choose a spacious spot with good acoustics. Assemble the kit neatly—begin with the bass drum, then add the snare, toms, and cymbals. Adjust everything for comfort, ensuring you can reach each component easily. Don’t forget to tune your drums for the best sound. This foundational knowledge will help you rock out in no time, and there’s so much more to learn!
Key Takeaways
- Choose a spacious and acoustically friendly area for your drum kit setup to ensure comfort and minimize noise disturbances.
- Start assembling the bass drum as the foundation, followed by attaching toms, snare, and cymbals for an organized layout.
- Adjust the height and tilt of the snare drum for ergonomic playing, ensuring it is accessible during performances.
- Tune each drum regularly using a drum key, adjusting tension rods in a star formation for even pitch and sound quality.
- Maintain your drum kit with routine checks and acoustic treatment solutions to enhance sound and prolong instrument life.
Understanding Your Drum Kit
When starting on the journey of drumming, understanding your drum kit is vital for success! A standard kit includes a bass drum, snare drum, and various toms, like the hi tom and mid tom. Each component is significant; the bass drum provides a deep thump while the snare adds sharp snaps. Don’t forget the cymbals! They typically consist of crash cymbals, ride cymbals, and hi-hat cymbals, all essential for sound variety. Additionally, drum hardware, including stands and pedals, supports your setup, ensuring stability. Drum heads should be tuned carefully for ideal sound, and drum tuning is an essential skill to master. With the right accessories, like drumsticks and a metronome, your drumming experience will surely improve! Practice pads, especially those with realistic sound simulation, can also significantly enhance your technique and rhythm.
Prepping for Setup

Setting up a drum kit can be an exciting adventure! To start, choose a spacious location that allows room for all components and comfortable seating. This will help create an inviting practice environment. Make sure you gather essential tools, like a drum key for tuning and maybe a screwdriver for hardware adjustments.
Next, plan your setup layout carefully. Position all drums and stands within easy access, making certain you can comfortably reach everything while maintaining proper posture. This is key for peak playability during your sessions! Remember to take into account acoustics, especially with acoustic kits, to keep noise disturbances in check. Additionally, consider the durability of hardware as it plays a crucial role in the stability and longevity of your drum set. Finally, verify that your setup allows for easy maintenance to keep everything in top shape for your drumming journey!
Assembling Your Drum Set
Assembling a drum set can feel like a thrilling puzzle, where each piece plays an essential role in creating beautiful music! Start with the bass drum as the foundation, ensuring stability with its legs firmly grounded. Next, attach the tom arms and mount the hi tom and mid tom; the smaller tom should be on the left for easy access. Position the floor tom on its legs to the right of the snare drum, adjusting the height for a comfortable playing position. Secure the snare drum on its stand, making sure the top rim sits just below your bellybutton. Finally, set up the cymbal stands and adjust their heights, so they are within easy reach during your common setup. Additionally, consider investing in triggers for your drum kit to ensure enhanced dynamics recognition and improved responsiveness while playing. Happy playing!
Recommended Products
Handles all hub and drum assemblies with included universal receiver and adapter sets

Fits 76” Wide Trailer Frames – Designed for trailers with a 89” hub face and 74” spring center, featuring a 5 on 4.5 bolt pattern. Ideal for tandem utility trailers, cargo trailers, boat trailers, and landscape trailers using 3,500 lb trailer axles and a 7,000 lb tandem axle capacity.

Constructing the Bass Drum

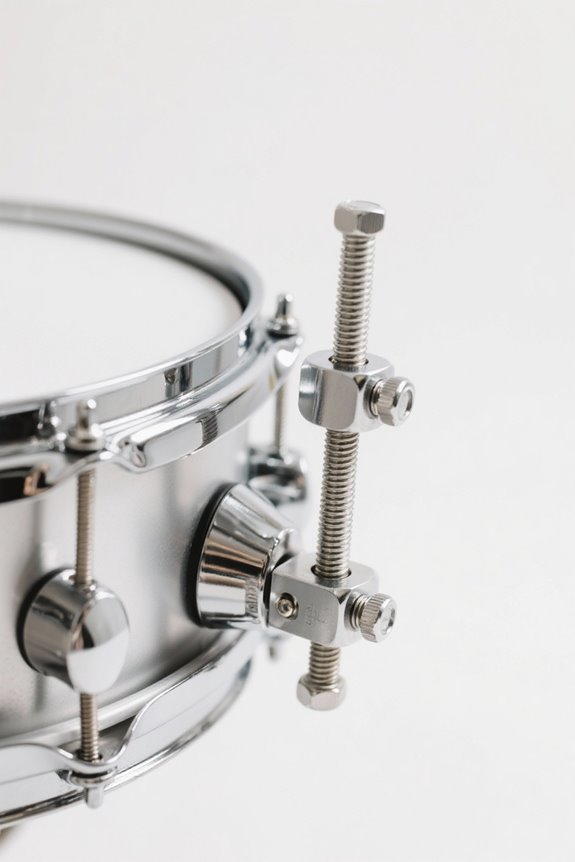
Constructing the bass drum is an exciting process that sets the stage for your entire kit! Begin by finding the largest drum shell and removing all packing materials for assembly. Place the back drumhead, often white, inside the shell, making sure the logo aligns with the legs for correct visual orientation. Next, attach the bass drum hoop by aligning its holes with the lugs for a secure fit. Insert the tension rods through the hoop holes into the lugs, finger-tighten them, and then use a drum key to adjust the tension to your preference. Finally, repeat these steps to secure the front drumhead, typically clear, completing the assembly of your bass drum! Additionally, selecting a quality drumhead, such as the Evans EMAD Onyx, will greatly enhance your bass drum’s sound quality. Happy drumming!
Setting Up the Snare Drum
The snare drum is an essential component of any drum kit, adding rhythm and texture to your beats! To set it up, first open the legs of the snare drum stand and adjust them for stability. Then, position the snare drum slightly to the left of the bass drum, ensuring comfortable access while playing. Adjust the height so the top rim sits a few inches below your bellybutton; this helps maintain an ideal playing posture. Next, tilt the snare drum a bit by loosening the angle adjustment nut, making the drumhead easily reachable. Finally, secure the snare drum with the adjustment nut, ensuring it sits firmly without causing excessive pressure that can affect sound quality. It’s also beneficial to consider including entry-level cymbals in your setup for a complete drumming experience. Happy drumming!
Arranging the Toms
Arranging the toms in a drum kit can enhance a drummer’s performance and overall experience! First, position the smaller high tom on the left and the larger mid tom on the right, angled slightly for easy accessibility. It’s essential to adjust their height to match the snare drum, ensuring comfortable playing. Use the tom arm mount to secure them to the bass drum, checking for stability as you play. For an ergonomic setup, place the toms a few inches above your thighs. Experiencing different spacing can help you find a personal preference that allows quick shifts between strikes while minimizing strain. With the right arrangement, the toms will feel like an extension of your own rhythm! Additionally, consider the benefits of high-quality mesh heads, which can greatly improve comfort and provide a more natural feel while playing.
Recommended Products
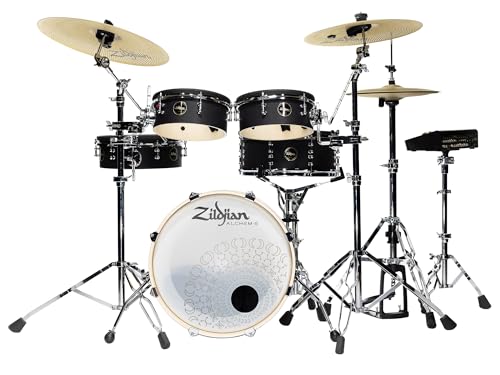
Drum Configuration- 14"x5" Snare Drum/ (2) 10"x4" toms/ 12"x4" tom/ 18"x7.5" Bass Drum. All feature 3 zones: head, rimshot, and rim.

6-ply/5mm all Maple SST shell

6-ply, 100% maple shells with satin finishes deliver warm, bright tone empowering you to be heard with clarity and precision.
Positioning the Hi-Hat and Cymbals
When drummers set up their hi-hat and cymbals, it’s important to create a comfortable and accessible workspace! Start by placing the hi-hat stand so the bottom hi-hat cymbal has the bell facing down on its lower felt. Verify the top hi-hat cymbal is secured with a clutch for proper contact. Adjust the height so the cymbals sit just above waist height for easy striking. For crash cymbals and rides, remember to position them with the bell facing up and use cymbal felts to minimize wear. Positioning the crash cymbal to the right of the hi-hat helps maintain ideal playing angles. This setup promotes a better comfort level while allowing you to play without straining your arms or shoulders! Consider using dampening gels to control unwanted ringing and overtones for a cleaner sound.
Ergonomics and Proper Drumming Posture
To enjoy drumming and improve performance, focusing on ergonomics and posture is key! Proper throne height keeps your thighs at a 90 to 110-degree angle, promoting a straight back for comfort. Position your arms close to your body, with elbows tucked in, to reduce tension and enhance efficiency. Remember, feet should stay flat on the pedals, giving you balance and control. Adjust your drum setup to minimize reaching or twisting; this helps you play better and avoids injuries. Regularly reassess your posture and setup to verify it supports peak performance as your skills grow. Additionally, investing in a throne with high-density foam padding can significantly enhance your comfort during long practice sessions. Making these tweaks can greatly enhance your drumming experience, so don’t hesitate to make adjustments! Happy drumming!
Tuning Your Drums
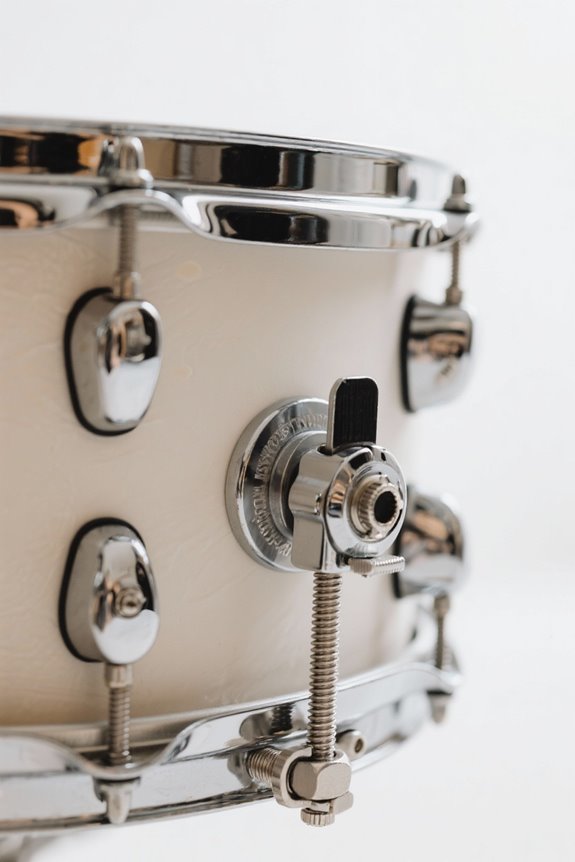
Tuning drums is like giving each one a voice of its own, and it’s crucial for achieving that perfect sound! To begin, adjust the tension rods evenly around the drumhead. Start by finger-tightening all rods until they stop, then use a drum key for gradual adjustments. Consider using a tuning pattern, like tightening opposite rods in a star formation, to maintain even tension. This approach guarantees a balanced pitch and sound quality. After playing, regularly check your tuning; fluctuations can happen due to temperature and humidity changes. Remember, online tutorials and apps can help enhance your ear for drum tuning. With practice, you’ll develop a keen sense for your drums’ ideal pitch, improving your overall drumming skills! Additionally, high NRC ratings in acoustic treatment panels can further enhance the sound quality of your practice environment by minimizing unwanted reverberations and echoes.
Frequently Asked Questions
How Do I Choose the Right Drumsticks for My Style?
To choose the right drumsticks, one should consider stick materials, grip styles, stick lengths, and genre preferences. Additionally, exploring rebound characteristics, sound dynamics, and customizing sticks from reputable brands enhances playing techniques and practice routines.
What Is the Best Type of Drum Kit for Beginners?
A budding drummer named Alex found an acoustic kit, balancing sound quality and durability, ideal for beginners. With budget considerations and future upgrades in mind, brands like Pearl and Yamaha offered reliable entry-level options and essential accessories.
How Often Should I Clean My Drum Kit?
A beginner should clean their drum kit weekly, employing drum cleaning techniques and dust removal methods. Regular maintenance, including routine inspections and cymbal cleaning tips, enhances longevity, protects surfaces, and mitigates humidity’s impact on the kit.
Can I Use Electronic Drum Sounds With My Acoustic Kit?
Can acoustic drums enhance electronic sounds? Yes, integrating acoustic drum triggers with a sound module allows MIDI drum conversion, enabling hybrid setups. This layering enhances sound selection, tackling live performance challenges in the acoustic versus electronic debate.
Where Should I Store My Drum Kit When Not in Use?
When not in use, a drum kit should be stored in a dedicated space with humidity control and temperature regulation, covered for protection. Accessibility considerations, sound isolation, and safety precautions guarantee long-term preservation and maintenance routine efficiency.


